Melissa's Cuisine

Tuesday, August 07, 2012

Caramel Apple Cheesecake

Can you believe it's August already?  I don't know where this summer has gone!  We've had a great summer, I just wish it wasn't nearly over.  Soon we'll be enjoying the crisper temperature of fall weather, along with delicious caramel apples--the inspiration for this cheesecake!

When Tina announced that this month's Crazy Cooking Challenge was Cheesecake, I was in luck.  I knew exactly what recipe I was going to make--in fact, I had already made it! 

I am typically in charge of making dessert for our Sunday dinners with my parents.  The Sunday that I made this dessert, we had dinner with my parents and Mike's parents, so I chose to make a fancier dessert than I typically would.

Photobucket
Everyone really enjoyed this cheesecake.  I loved the crunch of the apples on top, and the sweetness of the caramel topping.  This is a recipe I'll definitely be making again!
Caramel Apple Cheesecake

Serves 12-14

You will need:
2 cups crushed vanilla wafers
1/3 cup butter, melted
3 (8 ounce) packages cream cheese, softened
1 cup sugar
2 tablespoons flour
3 eggs
2 Tablespoons heavy whipping cream
1 teaspoon vanilla
1 large apple, diced
1/4 cup caramel ice-cream topping

1.  In a small bowl, combine the crushed vanilla wafers and butter.

2.  Press into the bottom and up the sides of an ungreased 9" springform pan.

3.  Place pan on a baking sheet and bake the crust at 400 for 10 minutes.  Remove from oven and set pan on a wire rack to cool.

4.  In a large bowl, beat cream cheese until smooth.

5.  Add the sugar and flour to cream cheese and mix well.

6.  Add in the eggs; beat on low until just combined.

7.  Stir in heavy whipping cream and vanilla.

8.  Pour filling into crust.  Bake at 350 for 40-45 minutes, until the center is almost set.

9.  Cool the pan on a wire rack for 10 minutes.  Then run a knife around the edge of the pan to loosen the crust.  Cool for 1 hour.

10.  Refrigerate the cheesecake overnight.

11.  Before serving, remove the sides of the pan.  Garnish with diced apples and caramel sauce.

Cover and refrigerate leftovers.

Slightly adapted from: The Taste of Home Cookbook

You can check out the other recipes I've made as part of the Crazy Cooking Challenge:
Double Coconut Fried Chicken--July 2012
Strawberry Cheesecake Smoothies--June 2012
Pizza Grilled Cheese--May 2012
Giant Streusel Topped Bluebery Muffins--April 2012
Spaghetti with Apple Tomato Sauce--March 2012
Chocolate Root Beer Bundt Cake--February 2012
Chicken Noodle Soup with Homemade Noodles--January 2012
Chocolate Chip Cookie Dough Fudge--December 2011
Garlic Mashed Potatoes--November 2011
Chocolate Chip Cookies--October 2011
Beer and Bacon Mac and Cheese--September 2011

Don't forget to click on the thumbnail picture for my recipe to vote for me! :)  Thank you :)

Friday, August 03, 2012

Cookie Dough Ice-Cream Cake

Melissa's Cuisine: Cookie Dough Ice Cream Cake
I have a confession to make:  I made this cake for Mike's birthday.  No big deal?  Well, his birthday is in November.  That's right, I've been holding onto this recipe since then.  Why?  I thought that an ice-cream cake was much more appropriate to share during the hot month of August rather than the chilly month of November.  This cake was too amazing not to share, so of course, I'm sharing it with you today. 
Melissa's Cuisine: Cookie Dough Ice Cream Cake
This cake begins with a layer of Chocolate Chip Cookie "Cake".  It's amazing just by itself, and it's what I made Mike for his birthday the first year we were married.  If I have to keep improving upon his cakes, this year's going to be insane...I better start thinking of ideas.  And what about 20 years from now, oh boy!

Anyway, the cookie cake is topped with Mike's favorite ice-cream--Chocolate Chip Cookie Dough.  Then it is covered with a layer of chocolate ganache.  And to top it off, I used my recipe for Ready to Eat Cookie Dough to make cookie dough truffles for the decoration.  The result?  This cake was out-of-this world delicious!

Melissa's Cuisine: Cookie Dough Ice Cream Cake

Cookie Dough Ice-Cream Cake

Serves 12+

1 Chocolate Chip Cookie Dough Cake (without the melted chocolate on top)
1 carton Chocolate Chip Cookie Dough Ice-Cream
1 batch of Ready-to-Eat Cookie Dough, rolled into 1 inch balls

Ganache:
3/4 cup heavy cream
8 ounces semi-sweet chocolate, chopped

1.  In a microwave safe bowl, microwave cream on medium high for 2 minutes.
2.  Pour over chopped chocolate and stir until smooth.

To assemble cake:

1.  Allow the Chocolate Chip Cookie Dough Cake to cool completely.

2.  Let the ice-cream thaw at room temperature for about 10 minutes, until it is spreadable.

3.  Spread the ice-cream in a thick layer over the Chocolate Chip Cookie Dough Cake.

4.  Pour ganache over the ice-cream.  It may harden quickly so work fast to spread it out.

5.  Place the cookie dough truffles on top of the ganache.

Serve immediately or freeze until you're ready to serve.  Let it thaw at room temperature for 5-10 minutes before cutting into it.  Freeze any leftovers in an air-tight container.

Note: If the Ready-to-Eat Cookie Dough is too sticky to roll into balls, add a small amount of flour or refrigerate it until it is easily handled.

***Edited to Add:  I've heard from a lot of you that this cake has presented issues.  Here are a couple suggestions I've come up with to help you:
-Instead of spreading the ice-cream over the cake as suggested in step 3, line a cake pan (the same size as the one you baked your cake in) with plastic wrap.  Spread the ice-cream into the pan and allow it to freeze.  Then flip the frozen ice-cream over the cake and remove the plastic wrap.  This should make that step a lot easier!
-Per the suggestion left in the comments, make the entire cake in a 9x13" pan. 

Wednesday, August 01, 2012

Fruit Popsicles

I started running about 20 months ago.  I'd never been much of an athlete, but for some reason I thought I'd give running a try.  Little did I know that I would end up loving it!  Since then, I've competed in 6 5k races and I'm currently training for my first half marathon (13.1 miles) in September.  I never thought I would be the person who runs 7+ miles at 7:00 on a Saturday morning for fun, but that was me last weekend!

One of the greatest things about running is the community.  I have a few "gym friends" who offer training advice as we're on the treadmills, as well as a great group of friends from church who are runners.  I've also discovered a fantastic group of running bloggers, I'm sure you've heard of a few of them!  This group, the Red Faced Runners, has set out to encourage others to get active.  On the weekend of September 8 & 9, the Red Faced Runners will be joining together to run various 5k’s all across the country.  I've signed up to join in the fun and there's always room for more!
When I run, I get really hot and sweaty (TMI? sorry...), so I try to find ways to cool down quickly when I've completed a run.  I drink a lot of cold water, but I've recently started making my own popsicles.  These are 100% natural fruit popsicles and they definitely do the trick of helping me to cool down!  They're healthy, simple to make, and they are a fantastic summer treat.
Fruit Popsicles

You will need:
fresh strawberries
fresh blueberries
pineapple juice
small dixie cups and popsicle sticks or popsicle molds

1.  Cut strawberries into quarters.

2.  Place a few pieces of strawberries and some blueberries in the bottom of the dixie cups.

3.  Pour pineapple juice over the fruit, filling the cup about 3/4 of the way.

4.  Place the cups on a tray and freeze them for about 1 hour.

5.  Then stick the popsicle sticks in the center of the popsicles and freeze 2-3 more hours, until completely frozen.

Peel off the dixie cups and enjoy!


Tuesday, July 31, 2012

Foodie Pen Pal

One of my favorite things about the Foodie Pen Pal program is the chance to try foods that I would not have had a chance to otherwise.  Every month, I eagerly await the arrival of my package and it's always so exciting to see what I receive.  This month's package was from Lara who blogs at My Milk Glass Heart.  She lives in Virginia so she sent me an assortment of items from her area!
The Lean Green Bean

This Himalayan Pink Salt is so fun!  Who doesn't like to put pink salt on their food? :)
I have to admit, I have never had grits before!  It's rather surprising considering that my dad was raised in Kentucky and we visited there often growing up.  Lara gave me a few ideas for how to prepare the grits and I'm looking forward to trying them!  See those adorable whale napkins in the back?  I think they're so fun :)
I was so excited to receive these strawberry rhubarb preserves.  I love strawberry rhubarb pie and I just saw a recipe that calls for strawberry rhubarb preserves--now I have some so I can make it!
This coconut soap smells amazing! I love finding new scented soaps and I like that this one is natural.
Lara also send me some Virginia peanuts.  I didn't know Virginia was known for their peanuts, so I'm thrilled to get to try some!

Thank you, Lara, for an incredible package!

If you're interested in joining Foodie Pen Pals, here's some helpful information for you:
-On the 5th of every month, you will receive your penpal pairing via email. It will be your responsibility to contact your penpal and get their mailing address and any other information you might need like allergies or dietary restrictions.
-You will have until the 15th of the month to put your box of goodies in the mail. On the last day of the month, you will post about the goodies you received from your penpal!
-The boxes are to be filled with fun foodie things, local food items or even homemade treats! The spending limit is $15. The box must also include something written. This can be anything from a note explaining what’s in the box, to a fun recipe…use your imagination!
-You are responsible for figuring out the best way to ship your items depending on their size and how fragile they are. (Don’t forget about flat rate boxes!)
-Foodie Penpals is open to blog readers as well as bloggers. If you’re a reader and you get paired with a blogger, you are to write a short guest post for your penpal to post on their blog about what you received. If two readers are paired together, neither needs to worry about writing a post for that month.
-Foodie Penpals is open to US & Canadian residents. Please note, Canadian Residents will be paired with other Canadians only. We've determined things might get too slow and backed up if we're trying to send foods through customs across the border from US to Canada and vice versa.
If you’re interested in participating for August, please CLICK HERE to fill out the participation form and read the terms and conditions.
You must submit your information by August 4th as pairings will be emailed on August 5th!

Monday, July 30, 2012

Stuffed Cabbage Casserole

When I was in Romania, I was served a lot of traditional Romanian foods.  My favorites were mici (sausages) and sarmales, which are stuffed cabbage rolls.  They are absolutely delicious and I've never had anything as good in the states.

I came across this recipe for stuffed cabbage casserole and I thought it looked and sounded delicious.  It also looked like it would take a lot less time to make than stuffed cabbage rolls.  I was right--it was very easy to put together.  It doesn't taste exactly like a sarmale, but it was the closest I've ever had here. 

Mike and I both enjoyed this meal, but we thought the ratio of cabbage to filling was off, so I've adjusted the recipe to reflect that.  This recipe makes a large pan full, so we had lots of leftovers.  It freezes well so I have enjoyed quite a few lunches from this dish!

Stuffed Cabbage Casserole

Makes a 9x13" pan, about 10 servings

You will need:
1 pound lean ground beef (I used ground turkey)
2 teaspoons olive oil, divided
1 large onion, chopped fine
1 Tablespoon finely minced garlic
1/2 teaspoon dried thyme
1 teaspoon sweet Hungarian paprika  
1 can (14.5 oz.) petite diced tomatoes with juice
1 can (15 oz.) tomato sauce
1/4 cup water
1 head green cabbage, coarsely chopped into 1 inch pieces
salt and fresh ground black pepper to taste
2 cups cooked brown rice
2 cups low-fat mozzarella cheese

1.  Cook ground beef in a large frying pan until it's browned and cooked through.  Remove from the pan and set aside.

2.  In the same pan, add 1 teaspoon of the olive oil and the onion and cook until the onion is translucent and starts to turn brown.  It will take about 5 minutes.

3.  Add in the minced garlic, thyme, and paprika and cook for 2 minutes.

4.  Add in the diced tomatoes with juice, tomato sauce, water, and cooked ground beef.  Simmer until slightly thickened, about 15-20 minutes.

5.  While the meat mixture simmers, heat the remaining 1 teaspoon of olive oil in a large frying pan.  Add the chopped cabbage and cook until the cabbage is wilted and about halfway cooked.  Season with salt and pepper.

6.  When the meat mixture has thickened, stir in the cooked brown rice.

7.  Grease a 9x13" casserole dish and layer half the cabbage, half the meat mixture, remaining cabbage, and remaining meat mixture.  Cover with foil.

8.  Bake at 350 for 40 minutes, until the edges begin to bubble.

9.  Remove foil and sprinkle with mozzarella cheese.  Bake uncovered for 20 more minutes.

Serve hot.
Source:  Skinny Taste

Friday, July 27, 2012

Christmas in July Link Party

Photobucket

I hope you've enjoyed the Christmas in July blog party this week!  In case you've missed a day...

We've had some delicious food posts:  

Wouldn't these Caramel Apple Cinnamon Rolls be a delicious Christmas morning breakfast?

There's a great Christmas recipe round-up at Mary's blog
Some beautiful handmade Christmas crafts:

This poinsettia stocking as absolutely gorgeous!  I think I might make one this year!
 
And some beautiful handmade Christmas cards:
Nicole shared some of her beautiful cards that she's been working on

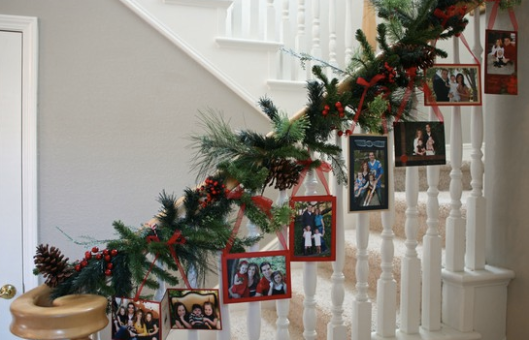
Sharon shared some great ideas for displaying Christmas cards.  I love this one!

You know that Christmas is my very favorite time of the year.  The excitement is all around and it's so contagious.  Christmas in July can be just as fun.  I'd like to invite you to link up some of your favorite Christmas recipes, crafts, and ideas.  Here are some of my favorite Christmas recipes:
These caramel puffs are delicious--I don't know why I only make them around Christmas!

These Rolo Pretzel Bites are so quick and easy to make.  Plus you can dress them up with Christmas colored M&M's!

This Spritz Cookies were my first experience with Royal Icing!  They're fun to decorate for winter :)

Peanut Butter Balls are a Christmas tradition in Mike's family.  A tradition I'm all over!

Pecan Snowballs are my favorite Christmas cookie.  They just melt in your mouth!

Hot Chocolate Mix makes a great homemade gift!

These Strawberry Almond Thumbprint Cookies are simple to make and so delicious!

These Melting Snowman Cookie Balls are almost too cute to eat...almost...

Hot Chocolate Snowballs are a fun variation of my favorite cookies!

This Cinnamon Roll French Toast Bake is a great Christmas morning breakfast!
How about a nice hot drink to warm up?  This Cider Wassail fits the bill!

Don't forget about these cute Snowman Cookies!

Now it's your turn!  Link up and be sure to visit some of the other links for great inspiration!

Wednesday, July 25, 2012

Chocolate Raspberry Fingers


It's still hot here, I just heard that the heat index for today could be over 100 degrees.  Insanity I tell you!  I still like to have some fun treats around the house, but I do try not to turn the oven on if I don't have to.   One great thing about this recipe is that it's no-bake.  I received this recipe from a good friend of mine who told me I had to try the "easiest and best cookies ever!"  Plus it's so simple to make--it's great for people short on time.

The original recipe for these cookie fingers called for orange juice.  I decided to swap it out for pink lemonade and add in some mini chocolate chips. I brought my friend some of my version of her cookies and she loved them.  Give these cookies a try, and don't be afraid to make up your own flavor combinations!

Chocolate Raspberry Fingers

Makes 18 cookies

You will need:

3-1/2 cups vanilla wafer crumbs
3 cups powdered sugar
1-1/2 cups chopped pecans
1 cup mini chocolate chips
6 ounces frozen pink lemonade concentrate, thawed, undiluted (I just used 1/2 of a 12 oz. can)
1/2 cup melted butter
1 cup sweetened coconut, toasted*

1.  In a large bowl, stir vanilla wafer crumbs, powered sugar, pecans, and chocolate chips until completely combined.

2.  Pour in thawed pink lemonade concentrate and melted butter.  Stir until the mixture comes together in a ball.

3.  Pull off golf ball sized pieces of the dough and roll them into logs the size of your pinkie finger.

4.  Roll the cookies into toasted coconut.

Store cookies in an airtight container in the fridge.

*Toasting the coconut is optional.  As you can see, I made some cookies without coconut, some with untoasted coconut, and some with toasted coconut.  Each was delicious!  To toast the coconut: spread the coconut in an even layer on a baking sheet.  Bake at 400 for 5 minutes (or until toasted), stirring after 2 minutes.

Source: Gerri K.

Monday, July 23, 2012

Strawberry Peach Frozen Yogurt


In case you haven't noticed, it's hot outside.  Like 100 degrees hot.  In Michigan.  I love summer and warm temperatures but this is a little crazy!  In the past month, 26 days have been around or above 90 degrees.  Our normal average high is 82 degrees.  We are not used to this kind of heat! 
As you can imagine, with the temperatures this high, I have been trying to not use my oven.  We have central air conditioning, but why make it work harder than it has to?

That's where this month's Secret Recipe Club recipe comes into play.  I was assigned to Christine's Kitchen Chronicles.  Christine learned how to cook because she had no choice (eat or die, right?), and she learned to love cooking.  She has so many fantastic looking recipes on her blog--perfect recipes for an everyday cook.  I browsed through Christine's site looking for recipes that didn't require turning my oven on.

Secret Recipe Club

I came across quite a few delicious looking foods before settling on her fabulous looking Strawberry Peach Frozen Yogurt.  I love frozen yogurt but it's so expensive to buy at a fro-yo shop.  For less than it would cost for Mike and I to go out for fro-yo, I made my very own at home. 

This frozen yogurt was delicious!  The flavors of the strawberries and peaches really shined through. I loved the thick and creamy texture of the fro-yo after it had melted a little bit.  I served this with some cake for a friend's birthday last week and it was a huge hit.  Thanks for a great recipe, Christine!

Strawberry Peach Frozen Yogurt

Makes 1 quart

3 cups vanilla Greek yogurt
3/4 cup sugar
1 teaspoon vanilla extract
2 cups fresh strawberries, diced
2 medium peaches, pitted and diced
2 Tablespoons sugar
2 Tablespoon vodka
2 teaspoons lemon juice

1.  In a small mixing bowl, combine the Greek yogurt, sugar, and vanilla extract.

2.  Stir until the sugar is dissolved.  Refrigerate for 1 hour.

3.  In a separate bowl, combine the diced strawberries, diced peaches, sugar, vodka, and lemon juice.  Refrigerate for at least 30 minutes.

4.  Place the yogurt mixture in the bowl of your ice cream maker and churn according the the manufacturer's directions.

5.  After 15 minutes, add in the fruit mixture and churn until completely combined.

Serve immediately for soft-serve frozen yogurt. 

If desired, pour the churned mixture into an air-tight container and freeze until ready to serve.  This will yield a hard-serve yogurt.  I recommend letting it sit on the counter at least 15 minutes before attempting to scoop it!

*The vodka can be eliminated if desired.  Its purpose is to prevent the frozen yogurt from freezing rock solid, but I found it did not really help.  My yogurt was still incredibly hard after being frozen.

Source:  Christine's Kitchen Chronicles

What is your favorite frozen treat?

Snowman Cookies

Merry Christmas!!!!

Uh wait...it's only July...it must be Christmas in July!

I've always wanted to celebrate Christmas in July, but until now, I haven't before.  Unless you count listening to Christmas music in July.   I love Christmas music so much that I listen to it year-round.  If a Christmas song comes on my iPod, I rarely skip to the next song (unless someone is with me...most people think I'm weird for listening to Christmas music when it's not Christmas!)
Photobucket

Anyway, I'm thrilled to be hosting one of three food stops on this Christmas in July blog party.  You can view the other two food parties at ADD Housewife and Go Ahead...Take A Bite!

On to the recipe...

As a kid, I loved to make snowmen with my family.  We'd always eagerly wait for the snow to be deemed perfect packing snow and out we'd go.  We'd grab my dad's hat and scarf, a couple old brooms, a carrot, and a bunch of rocks.  Creating snowmen is one of my favorite winter memories!

What is cuter than a snowman? How about a snowman you can eat?  As I was thinking about what recipe to share, I wanted to come up with something fun that anyone can enjoy.  I think kids of all ages (even big kids like me *smile*) would enjoy making these fun and tasty snowmen cookies.  They're a fun treat for a snow day (anybody wishing for snow in the middle of this HOT July?) or a Christmas party. 

I hesitate to share detailed directions for this recipe, but I will anyway. Just keep in mind that the measurements won't be exact because it depends on how thickly you coat your cookies with the chocolate. If you don't want to coat an entire package of cookies, that's fine too!  If you want to make the smaller (1 piece) snowmen, use Nutter Butter cookies, for a 3 piece snowman, use Oreos.  Just have fun with it!

Snowman Cookies

You will need:
1 (16 ounce) package Candy-Quick white chocolate
1 package Nutter Butter cookies or Oreo cookies
1/4 cup semi-sweet chocolate chips
food coloring

1.  Melt the white chocolate according to the package directions.

2.  Scoop 1 Tablespoon of melted chocolate into 3 separate small bowls.  Add food color to achieve desired colors.  I used red for the mouth, blue for the eyes, orange for the nose, and semi-sweet chocolate for the buttons.

3.  Melt the semi-sweet chocolate chips in a small bowl and set aside.

4.  Dip cookies into the melted chocolate using a fork to remove it.  Gently wiggle the fork with the cookie on it to allow excess chocolate to drip off.

5.  Place dipped cookies on waxed paper to harden.

6.  Scoop the colored chocolates and semi-sweet chocolate into small sandwich bags with a hole snipped in the corner (or pastry bags) and decorate the dipped cookies as desired. 


Be sure to check back each day this week for the other party posts!

Tuesday:  Hand Crafted Items at Stone Gable and Living on Cyprus Hill
Wednesday:  Cookie Exchange at Laughter and Grace
Thursday:  Christmas Card Ideas at Scraptastic Memories and Mrs. Hines Class
Friday:  Your turn!  Share your favorite Christmas recipes, crafts, and decor ideas--you can link up on my blog!

Have you ever celebrated Christmas in July?

Friday, July 20, 2012

Strawberry Rhubarb Cobbler

It's the very tail end of strawberry season around here.  If you hurry, you might still get some fresh from the farmer's market.  While you're there, pick up a few stalks of rhubarb--you'll need it!

This delicious dessert features the flavors of summertime.  Fresh strawberries and rhubarb combined into a sweet cobbler--it's the perfect summer dessert.  Top it with a scoop of vanilla ice-cream and you're all set!

Strawberry Rhubarb Cobbler

Serves 8

You will need:
3 cups fresh strawberries, cut into fourths
1 cup fresh rhubarb, cut into bite-sized pieces
2 cups + 2 Tablespoons sugar
1 stick margarine
2 teaspoons baking powder
3/4 cup flour
1/2 teaspoon salt
3/4 cup milk

1.  Combine strawberries, rhubarb, and 1 cup sugar in a bowl.  Set aside.

2.  Melt margarine in a 9x13 inch dish.

3.  Mix 1 cup sugar, flour, baking powder, salt, and milk together in a small bowl.

4.  Pour on top of margarine in baking dish.  Do not stir.

5.  Top with strawberry rhubarb mixture.  Again, do not stir.

6.  Bake at 350 for 45 minutes.

7.  Cool for about 5 minutes and then sprinkle remaining 2 Tablespoons of sugar over the crust.
01 10 11 12
Blogging tips