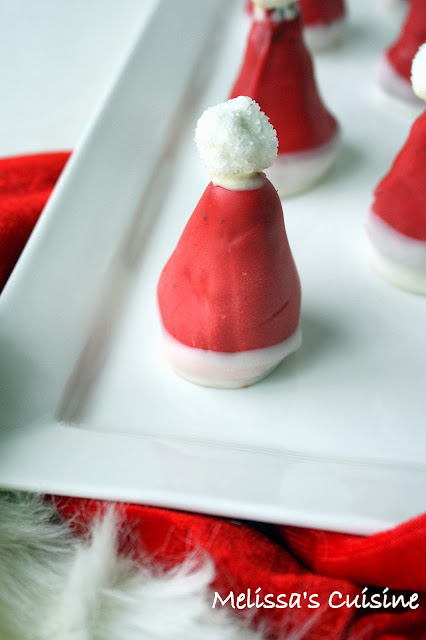
This past Saturday was our 3rd annual Christmas Cookie Exchange at my mom's friend's house. As in the years past, everyone brought gorgeous cookies! We enjoyed a delicious lunch, good company, and fun cookies. Though I have to say, the newest addition to our group absolutely stole the show!
I don't think anyone minded though!
If you've been anywhere on social media (especially Pinterest!) since October, I'm sure you've seen all kinds of Christmas cookie ideas. I spent a good amount of time looking for the perfect cookie to bring to the cookie exchange. When I saw these Santa Hats, I knew I had scored! I'd previously made S'mores Thumbprint Cookies and Christmas colored Swirl Cookies, so I wanted to keep my tradition of creative cookies.
I do have to admit that these cookies were much more time consuming than I had expected. However the cuteness factor made it worthwhile, and they are pretty tasty too! Though time consuming, the method of making these cookies is quite simple. Mix together crushed cookies and cream cheese, shape into hats, dip in melted chocolate, and then decorate. I had fun making them and I think you will too!
Oreo Cookie Ball Santa Hats
Makes 18-20 cookies
Ingredients:
1 package Oreo cookies
1 package cream cheese
2-3 cups Red Candy Melts
1 cup White Candy Melts
18-20 mini marshmallows
white sprinkles (optional)
1. Crush the Oreo cookies in your food processor. (Depending on the size of yours, you may need to do this in batches.)
2. Combine the crushed cookies and cream cheese in a medium bowl. You can use a mixer or your hands (like I did!)
3. Scoop out cookie "dough" and roll into 1" balls. Then pinch the top of the balls into a cone shape.
4. Place formed hats on a parchment lined cookie sheet and place in your freezer for about an hour.
5. In a microwave safe measuring cup, melt the red candy melts. I usually do mine for a minute and then additional 15 second increments until the candy has melted and can be stirred smooth. (Actual time may depend on your microwave.)
6. Dip each cookie hat into the melted red candy, allow the excess coating to drip off, and then place the cookie back on the cookie sheet until the candy hardens.
7. While the red candy is hardening, melt the white candy melts.
8. Dip the bottoms of the hats in white candy. Return to the cookie sheet to harden.
9. If desired, moisten the marshmallows with water and then roll in white sprinkles. (I just got my fingertips wet and then touched the marshmallows to moisten them.)
10. Dip one side of the marshmallow in the white candy and then attach it to the top of the red hat.
Store in an airtight container in the fridge.
Source: Shugary Sweets


