Melissa's Cuisine: November 2011

Wednesday, November 30, 2011

Fanned Garlic Potatoes

For some reason, potatoes seem to get a bad rap.  It's probably because of their high carbohydrate content, but as a runner, that's a great thing for me!  Potatoes also contain a good amount of fiber, protein, iron and vitamin C.  You can check out more of their stats here.

While I already admitted I'm not a huge fan of mashed potatoes, I do love baked potatoes.  And I love to prepare them this way, the presentation is just so fun!  Mike had never seen fanned potatoes before, so it was a fun surprise for him.  We both loved the flavor that the garlic infused into each bite of the potato.  I think I'll be skipping the traditional baked potato and preparing them this way more often!

Fanned Garlic Potatoes

You will need:
1 medium potato for each person you're serving
2 garlic cloves per potato (more or less depending on your garlic preference!)
olive oil

1.  Be sure to thoroughly scrub your potatoes to remove all dirt from the skin.

2.  Using a sharp knife, carefully slice the potato into thin slices, being careful not to slice all the way through.

3.  Slice each garlic clove into thin slices.

4.  Place a slice of garlic in between each slice of potato.

5.  Drizzle potato with olive oil.

6.  Place in a shallow baking dish and bake at 350 for 1 hour, until potatoes are tender.

Serve plain or garnish with cheese if desired.

Monday, November 28, 2011

Chocolate Peanut Butter Dippers

I'm always on the look out for easy snacks for Mike and myself.  The other day I was looking through one of Mike's mom's Food and Family magazines and oohing & ahhing over all the ideas I found.  I ended up borrowing some of her magazines and photocopying half the recipes so I can try them out.  I don't (currently) subscribe to this magazine (yet) but it's one of my favorites because the recipes are so family friendly and something the every-day person can easily make!

It took all of 10 minutes to put this treat together.  I brought Mike one to try and he said "I hope you made more of those!"  Luckily for him, I had, but they're so easy I can make them whenever the craving strikes.  These little dippers combine two of my favorite things, peanut butter and chocolate, so they're a hit in my book too!

Peanut Butter and Chocolate Dippers

Makes 6 (but can easily be doubled or tripled to make more!)

You will need:
12 Nilla wafers
2 Tablespoons peanut butter
1/2 cup semi-sweet chocolate chips

1.  Spread 6 of the Nilla wafers with about 1 teaspoon of peanut butter each.

2.  Top with another wafer to make little cookie sandwhiches.

3.  In a microwave safe bowl, microwave chocolate chips for 30 seconds or until melted.

4.  Dip each cookie sandwhich halfway into the melted chocolate.

5.  Place on wax paper and allow it to set.  Refrigerate if needed.

Friday, November 25, 2011

Spaghetti Squash

I hope you had a great Thanksgiving Day!  We really have so much to be thankful for!

Are you still stuffed from the holiday goodies you consumed yesterday?  Or, did you burn off all those extra calories out shopping this morning?  Either way, I thought a healthy recipe would be ideal for today!

Until recently, I had never had spaghetti squash.  I'm not a fan of squash in general, so I assumed that I wouldn't care for spaghetti squash.  My dad prepared some for Sunday dinner and I took a small spoonful to try it.  It was completely different from what I expected, and Mike liked it as well!  I couldn't get it out of my head so I ventured out to my local farmer's market to see if they still had an spaghetti squash, and they did!  I picked up a medium squash and brought it home to prepare for Mike and myself.  It was so easy and delicious, not to mention super healthy!

I served the spaghetti squash topped with spaghetti sauce and Parmesan as a side with pork and potatoes for dinner, but I took just the spaghetti squash and sauce for lunch to work the next day.  You can serve it either way--a side or as the main course.

Spaghetti Squash

Servings depend on the size of your squash and how you serve it.  One medium squash made 4 side-sized servings.

You will need:
1 spaghetti squash
1 Tablespoon butter
salt
Pasta sauce, optional
Parmesan cheese, optional

1.  Using a sharp knife, cut the spaghetti squash in half lengthwise.  Scoop out seeds and discard.

2.  Place both halves of the squash on a cookie sheet.  Put 1/2 Tablespoon of butter in the center of each piece of squash.

3.  Bake at 350 for 35-40 minutes, until squash is softened.

4.  Using a fork, scrape the inside of the squash to form strands and place in a bowl.  Salt to taste.

Serve as is, or if desired, with pasta sauce and parmesan cheese.

Wednesday, November 23, 2011

Pasta with Roasted Tomatoes

It's that time of year that sweets treats and goodies are being offered at every turn.  As delicious as they are, I sometimes find myself craving something savory and healthier to make up for the sugar overload!  This is a delicious way to incorporate some healthy grains, vegetables, and meat into your diet.

Mike actually helped me prepare this dish!  I left some instructions on the counter for him and the meal was halfway finished by time I got home from work.  If Mike can make this meal, anyone can!
Pasta with Roasted Tomatoes

Serves 4

You will need:
6 cups cherry tomatoes, halved
1 shallot, halved and sliced thin
2 Tablespoons olive oil
1 Tablespoon balsamic vinegar
3 garlic cloves, sliced thin
1 teaspoon sugar
salt and pepper
1 pound lean ground turkey, browned (you can use ground beef too)
12 ounces whole-wheat penne
1/2 cup grated Parmesan cheese
1/4 cup shredded fresh basil

1.  In a bowl, toss tomatoes with the shallot, oil, vinegar, garlic, sugar, 1/2 teaspoon salt, and 1/4 teaspoon pepper.

2.  Spread the tomatoes out on a baking sheet and roast at 350 degrees for 35-40 minutes, until the tomatoes skins have shriveled slightly.

3.  Remove the tomatoes from the oven and let them cool for 5-10 minutes.

4.  While tomatoes are roasting, bring 4 quarts of water to a boil.  Add the penne and 1 Tablespoon salt and cook until al dente, stirring often.

5.  Reserve 1/2 cup of the cooking water and then drain the pasta and return it to the pot.

6.  Add the tomatoes and ground turkey into the pot with the pasta.

7.  Add 1/4 cup of the Parmesan and basil and toss gently to combine.

8.  Before serving, add the reserved cooking water as needed to loosen the sauce.  Season with salt and pepper to taste, and sprinkle with the remaining 1/4 cup Parmesan. (I didn't have fresh Parmesan so I used Asiago instead)

Adapted from:  The America's Test Kitchen Healthy Family Cookbook

Monday, November 21, 2011

Speculoos

It's the third Monday in November, and by now I'm sure you know what that means!  It's reveal day for the Secret Recipe Club!  This is my fifth month participating now and each month I have so much fun browsing through a new (to me) blog and making a list of delicious looking recipes to try. 

This month, my "short-list" of recipes ideas consisted of 10 fabulous looking recipes from Chris' blog, The Café Sucré Farine. Be sure to visit her blog to read the story behind her blog name, get a quote for your weekly inspiration, take in the beauty of her husband's food photography, and of course drool over her delicious recipes!

I grew up eating what we always referred to as "Windmill cookies", so when I saw Chris had a recipe on her site, I knew I'd have to make it. These were always one of my Mom's favorites and, being from a Dutch family, I remember many tea times that we enjoyed the "Windmill cookies". Mike also loves "Windmill cookies" and quite often packs them in his lunch.

I grew up with the Dutch version of these "Windmill cookies", actually called Speculaas. But when I saw on Chris' blog that they are Belgian and called Speculoos, I was intrigued at the difference. I decided to dig a little deeper and found that most recipes for both Speculaas and Speculoos are quite similar and in fact, they are the same cookie, just with a different name from each country! So whether you want to eat Speculaas or Speculoos, this is a cookie any one will enjoy!
Speculoos

Makes 2 dozen cookies

You will need:
2 cups all purpose flour

1 tablespoon ground cinnamon
1-1/2 teaspoons ground ginger
1/2 teaspoon ground cloves
1/2 teaspoon baking powder
1/2 teaspoon salt
1-1/4 cups (packed) dark brown sugar (I used regular brown sugar since it's what I had on hand)
1/2 cup (1 stick) unsalted butter, room temperature
1 large egg
sugar, for sprinkling

1.  In a medium bowl combine flour, cinnamon, ginger, cloves, baking powder, and salt.

2.  In a large bowl, beat brown sugar and butter with an electric mixer until light. Add egg and beat until fluffy.


3.  Gradually add in dry ingredients and beat until just combined.

4.  Cover bowl with plastic wrap and refrigerate for 1 hour.

5.  Divide the dough in half and roll it out on a floured surface to 1/4 inch thick.

6.  Use a cookie cutter of your choice to cut as many shapes as possible and place cut cookies on a parchment-lined cookie sheet.

7.  Repeat with the other half of the dough, gathering scraps and cutting out as many cookies as possible.

8.  Lightly sprinkle cookies with sugar.

9.  Bake at 350 for 12-14 minutes.

Enjoy the Dutch way--with a cup of hot tea, or my way--with hot chocolate!

Friday, November 18, 2011

Baked Pumpkin Donuts


Two donut recipes in the same week?  What can I say?  I told you I like donuts :) 

The original recipe made these baked donuts as donut holes.  Since I'm having so much fun with my new mini donut pan, I decided to make some mini donuts as well. 


These were a huge hit in our house!  Mike wanted to eat them all before I had a chance to even snap a picture of them.  I think they lasted about a day and a half and then they were all gone.  I can't wait to make these again!

Baked Pumpkin Donuts

Makes about 24 donuts

For donuts:
1-3/4 cups flour
2 teaspoons baking powder
1/2 teaspoon salt
1/2 teaspoon cinnamon
1/2 teaspoon nutmeg
1/3 cup vegetable oil
1/2 cup brown sugar
1 egg
1 teaspoon vanilla
3/4 cup pureed pumpkin
1/2 cup milk

For coating:
1 stick (1/2 cup) margarine
2/3 cup sugar
2 Tablespoons cinnamon

1.  In a medium bowl, combine flour, baking powder, salt, cinnamon, and nutmeg.

2.  In a large bowl, whisk together oil, brown sugar, egg, vanilla, pumpkin, and milk.

3.  Add dry ingredients to wet ingredients and stir until just combined.

4.  Scoop batter into greased tins. I used both mini muffin tins and my mini donut pan.

5.  Bake at 350 for 10-12 minutes, or until a toothpick comes out clean.

6.  While donuts are baking, melt margarine in a small bowl. 

7.  Combine sugar and cinnamon in another small bowl.

8.  Allow donuts to cool for 2 minutes.  Then dip each donut first in the margarine and then roll in the cinnamon sugar.

Source: The Craving Chronicles


Wednesday, November 16, 2011

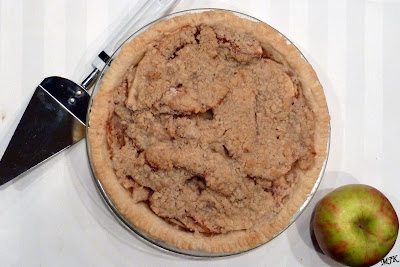
Apple Crumble Pie

As you know, one of Mike's favorite desserts is his Ma's Apple Crisp. He would probably say that his next favorite dessert is Apple Pie.  He's all-American I tell you!  When I ask him what he would like for dessert, 9 times out of 10 he would request some kind of pie.  He's not a cake person (bummer...because I am!), or much of a brownie lover either.  But give him a big slice of pie with a scoop of ice-cream and he's happy!

When we went apple picking this fall, one of the two things Mike requested was an apple pie, of course!  I was more than happy to oblige, but I had to admit, I can probably count the amount of pies I've ever made on 1 hand.  We, of course, decided it was time to change that!  I used my go-to pie crust recipe and a basic crumble topping to create this pie.  Though I wish I had use at least one more apple in the filling (mine cooked down quite a bit), we were thrilled with how the pie turned out, and I'm sure I'll be making many more.

I waited to post this pie recipe, because I knew of a very exciting party being hosted by Cheryl, of Tidy MomCome join Love the Pie with TidyMom  sponsored by Cherokee USA, Le Creuset, Wilton, Bags by Bloom and  Harvard Common Press!!!


Apple Crumble Pie

Serves 8

You will need:
1-1/4 cups flour
1/2 teaspoon salt
1/3 cup shortening
4 to 5 Tablespoons cold water
4 large apples, peeled and sliced
1/2 teaspoon cinnamon
1/2 cup sugar

Topping:
1/2 cup flour
1/2 cup sugar
1/4 cup cold butter

1. Combine flour and salt. Cut in shortening until crumbly. Gradually add water and stir until a ball forms.

2. Cover and refrigerate 30 minutes, until it's easy to handle.

3. Roll dough on lightly floured surface to fit your 9 or 10 inch pie plate. Transfer pie to plate and trim pastry. Flute edge as desired.

4. Toss apples with cinnamon and sugar until coated.  Place apples in pie crust. 

5. In a small bowl, combine flour, sugar, and butter until crumbly.  Sprinkle on top of apples.

6. Bake at 350 for 45-50 minutes, until crust is golden brown.

Lark's Country HeartWCWjpg It's a KeeperParty Button

Monday, November 14, 2011

Baked Buttermilk Donuts

A few weeks ago I volunteered to pick up donuts and bring them to work for Mike and his co-workers.  I couldn't resist picking up a donut for myself while I was at the bakery.  That one donut struck a craving that I just couldn't kick! 

Luckily for me, I had just won a gift certificate to Michael's so one of the things I picked up was a donut pan.  As soon as I got home I pulled out the ingredients and got to work making some baked donuts.

Of course, you just can't compare baked donuts with a fried donut.  Sure, they're both delicous in their own way, but each really does have it's own flavor and texture.  And, if you're anything like me, you can justify eating a baked donut for both breakfast and a mid-morning snack because it's practically a muffin...right?

I made both "regular" sized donuts (the size from the Wilton pan) and "mini" donuts (from my Avon pan).  1 regular sized donut was equivalent to about 3 or 4 mini donuts (really, they are mini!), so of course I could justify eating 3 or 4 mini donuts at a time because it's basically like eating 1 regular one...right?

I know, my logic might be flawed...but indulge me! :)
Baked Buttermilk Donuts

Makes 24 "regular" sized donuts

2 cups flour
3/4 cup sugar
2 teaspoons baking powder
1 teaspoon salt
1/4 teaspoon nutmeg
1/2 teaspoon cinnamon
3/4 cup buttermilk
2 eggs
2 Tablespoons margarine, melted

Glaze:
1 cup powdered sugar
1/4 cup cocoa powder
1-2 Tablespoons water (adjust amount as needed to make a thick glaze)

1.  In a large bowl combine flour, sugar, baking powder, salt, nutmeg, and cinnamon.

2.  In a smaller bowl, whisk together buttermilk, eggs, and melted margarine.

3.  Pour wet ingredients into dry ingredients and stir until just combined.

4.  Fill donut pan 3/4 of the way full (or follow the instructions for your donut pan).  These donuts do rise, so don't fill the pan to the top.

5.  Bake at 350 for 20 minutes, until donuts spring back when touched.

6.  While donuts are baking, mix together ingredients for the glaze.  Allow the donuts to cool before dipping the the glaze and top with sprinkles if desired. 

Slightly adapted from Wilton

Mouthwatering MondaysThings that make you say: PermanetPosies.com Nap-Time Creations

Thursday, November 10, 2011

Chocolate Covered Seafoam

Last year for Christmas, Mike's mom handed me a Ziploc container.  Inside was possibly one of the best gifts I've ever received (well...food-wise that is!)  A bunch of my favorite "specialty store" candy--chocolate covered seafoam!  I love the sweet creamy chocolate coating followed by the crisp seafoam. 

Then I remembered that my mom used to make seafoam for a friend of hers.  I remember it being quite a tricky recipe and causing a few kitchen disasters.  (Maybe the reason she rarely made it!)  I finally remembered to ask her for the recipe and after my own kitchen disaster (burning my first batch), I succeeded in making a delicious treat!

Don't be afraid to try this--the trickiest part is not burning the candy, so I've shared my trick in the instructions.  The good part is that the recipe is all sugar, so if you do burn a batch, just fill your pan with water and it will dissolve!  Then try again...it's worth it!

Chocolate Covered Seafoam

You will need:
1 cup sugar
1 cup corn syrup
4 teaspoons baking soda
2 cups semi-sweet chocolate chips

1.  Generously grease 3 cake pans and set aside.

2.  In a large saucepan, bring sugar and syrup to a boil over medium heat.  Stir constantly until sugar is dissolved.

3.  Bring sugar mixture up to 305 degrees, stirring occasionally.  (I've found that in order to not burn the candy, it's easiest to remove the pan from the heat when the sugar mixture reaches 300 degrees.  The candy temperature will continue to rise for a few seconds and leaving it on the heat brings the temperature up too quickly, resulting in burned candy.  Not fun...trust me!)

4.  Pour baking soda into syrup all at once.  Sugar mixture will foam up quickly--be careful!

5.  Mix thoroughly and quickly.  Pour into greased pans.

6.  Allow the candy to cool for a couple hours before breaking into pieces.

7.  Melt chocolate chips in a microwave safe bowl.

8.  Dip seafoam into chocolate and set on waxed paper to harden.  Store in an airtight container.

Recipe from my mom

Monday, November 07, 2011

Garlic Mashed Potatoes

I have a confession to make.  I'm not a fan of mashed potatoes.  I'm strange, I know...I like baked potatoes, fried potatoes, diced potatoes, or smashed potatoes, but there's just something about the mushy texture of mashed potatoes that does me in!  When it was revealed that November's Crazy Cooking Challenge was mashed potatoes, I decided I needed to find a mashed potato recipe that I enjoyed.

Photobucket


After browsing though a few of my favorite blogs, I came across a recipe on Gina's Skinny Recipes for Skinny Garlic Mashed Potatoes.  Do you remember the Strawberry Cheesecake that was a huge hit with my family?  I found that recipe on Gina's blog, so I knew the chances were pretty good that I'd like her mashed potatoes as well!

This recipe includes three delicious flavors, garlic, chicken (from the broth), and sour cream.  Combined with the potato, the flavors work very well together.  I'm pleased to tell you I was successful in my goal, and I'm proud to present to you, my favorite mashed potato recipe! 

Oh, and don't forget, you can vote for your favorite mashed potato recipe by clicking "like" under the picture of the recipe! (I'm #21!)

Garlic Mashed Potatoes

Serves 4

You will need:
4 potatoes, peeled and cubed
4 large garlic cloves, peeled and halved
1/4 cup fat-free sour cream
1/4 cup fat-free chicken broth
2 Tablespoons skim milk
1 Tablespoon light butter
1/4 cup fresh herbs of choice: parsley, thyme, tarragon (*I used dried parsley, thyme, and some chives for garnish)
kosher salt to taste
dash of fresh ground pepper

1. Put potatoes and garlic in a large pot with salt and enough water to cover. Bring to a boil, then simmer for 20 minutes until potatoes are tender.

2. Drain and return potatoes and garlic to pan.

3. Add sour cream, chicken broth, milk, butter, and herbs to potatoes.

4. Using a masher, mash until smooth.

5. Season with salt and pepper to taste.

Source:  Gina's Skinny Recipes
Nap-Time Creations

Secret Recipe Club

Friday, November 04, 2011

Chocolate Topped Peanut Butter Granola Bars

One of my favorite snacks is granola bars.  I really like the new Nature Valley Granola Thins.  Mike's grandma gave us some and I've been hooked ever since.  I never really liked the crunchy granola bars, but these have converted me! 

I've been making my own granola bars for years, remember the Chewies I told you about?  I used to make them back in middle school!  I really liked the idea of topping granola bars with chocolate or peanut butter, so I thought I would try that out with my new favorite granola bar recipe.  I feel like this is a pretty healthy recipe, it is low fat, uses whole wheat flour, and honey instead of corn syrup.  You could up the health factor by using dark chocolate instead of semi-sweet chocolate for the topping, but I'm not a huge fan.

On another note, did you notice that my blog has gotten a makeover?  (If you're reading this through Google Reader, click over to visit my blog and check it out!)  I'm still working on creating a recipe index for you as well as working on some other pages, but the overall look of my blog is completely different.  I'd like to give a huge thank you to Elena from Three Little Birdies Designs!  If you're thinking about a new look for your blog, I'd highly recommend Elena!
Chocolate Topped Peanut Butter Granola Bars

Makes 18 bars

You will need:
2-1/2 cups oats
3/4 cup brown sugar
1/2 cup whole wheat flour
1/2 teaspoon baking soda
1/2 teaspoon baking powder
1/2 teaspoon salt
1/2 cup honey
1/2 cup peanut butter (I use natural)
1 teaspoon vanilla
1/2 cup chocolate chips

1.  In a bowl, combine oats, brown sugar, flour, baking soda, baking powder, and salt.

2.  Stir in honey, peanut butter, and vanilla.  At this point, I find the mixture to be too thick to mix with a spoon, so I just use my hands!

3.  Press granola into a greased 9x13 pan.  It will look crumbly but it will bake together.

4.  Bake at 325 for 20 minutes, until the edges of the bars are browned.

5.  Sprinkle hot granola bars with chocolate chips, let them melt, and then spread over the bars.

6.  Cut into 1-1/2 inch bars.  I cut the bars width-wise first, and then I make one cut down the center of the pan length-wise.  Use a pizza cutter to cut bars--it makes it so much easier!

Store in an airtight container.

Tuesday, November 01, 2011

Baked Caramel Apples

These apples were so delicious!  I made a batch the other day and served it with pork chops.  Growing up, we always had applesauce with our pork chops, so the pair seem so natural to me.  Apples are in great abundance here in Western Michigan, and I love to cook with apples. 

I eat at least an apple a day--it's good for you, you know the saying don't you?  Typically, I cut up an apple for my lunch, but I like to slice them up in my morning oatmeal, or a salad, or make a pie (recipe coming soon!), or a crisp, or spiced apples... Can you tell I like apples?  I know that if you are an apple lover, you'll love this simple and delicious recipe!

Baked Caramel Apples

Serves 6

You will need:

8 apples, peeled, cored, and cut into thick slices (I used a combination of Gala, Granny Smith, and Jonathan)
1 cup brown sugar
1/4 cup water
2 Tablespoons margarine
1 teaspoon salt
2 Tablespoons flour
1 teaspoon cinnamon

1.  In a small saucepan, combine brown sugar, water, margarine, salt, flour, and cinnamon.  Bring it to a boil and stir occasionally until it thickens.

2.  Place apples in a baking dish and cover with caramel sauce.  Stir to coat.

3.  Cover and bake at 350 for 1 hour, stirring after 30 minutes.  Let the baked apples sit for a few minutes after you remove them from the oven so the caramel will thicken.

Serve alongside pork, on top of ice-cream, or plain!


PermanetPosies.com Nap-Time CreationsLark's Country HeartWCWjpg Cast Party WednesdayIt's a KeeperParty Button
01 10 11 12
Blogging tips